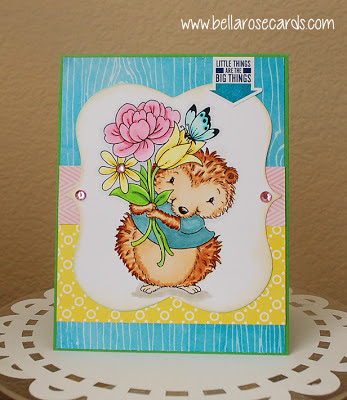
Okay, one big post with all the stamps from the great designers for SPandcompany and for MarkerPop. No way I can say thanks enough:) I hope I didn't miss anyone, please let me know if I did!
Showing posts with label crafts. Show all posts
Tuesday, July 2, 2013
Monday, July 1, 2013
Tuesday, June 25, 2013
Summertime Fun Giveaways:)
It's not too late to Hop and have a chance to win some great prizes from SPandcompany as well as MarkerPop:)
HOW TO WIN:
Visit the blogs on the hop list below and leave a comment on their Blog Hop post. TWO winners will be randomly selected from all comments left. The more you comment on, the better your chances of winning!
Hop will run through Tuesday, June 25th at 11:59pm EST. Blog Hop winners will be announced Wednesday, June 26th!
Happy Hopping!
PRIZES:
We have TWO great prizes up for grabs. One sponsored by MarkerPOP! and one from SP & Company!
Prize #1 - Sponsored by SP & Company: 1 Stamp Set and 2 Single Stamps of Winner's Choice all from the SP & Company - Tina Wenke Collection
Prize #2 - Sponsored by MarkerPOP!: $20 Voucher to the MarkerPOP.com Store
HOW TO WIN:
Visit the blogs on the hop list below and leave a comment on their Blog Hop post. TWO winners will be randomly selected from all comments left. The more you comment on, the better your chances of winning!
Hop will run through Tuesday, June 25th at 11:59pm EST. Blog Hop winners will be announced Wednesday, June 26th!
Happy Hopping!
1. MarkerPOP! Blog
2. SP & Company Blog
3. Amber
4. Chrissie
5. Danielle
6. Jenn
7. Kelli8. Marie9. Marlena10. Melissa
11. Michelle L.
12. Michelle P.
13. Tina14. Tracy
2. SP & Company Blog
3. Amber
4. Chrissie
5. Danielle
6. Jenn
7. Kelli8. Marie9. Marlena10. Melissa
11. Michelle L.
12. Michelle P.
13. Tina14. Tracy
Monday, June 24, 2013
New Stamps!
Well, it's been just a little bit (LOL) since my last post, but it's worth it now definitely to make a new one! I miss everybody and and am turning over a new leaf by really posting more and reading more. I love seeing what everyone is doing, it's just so hard to keep up!
As you can see, I've teamed up with Spandcompany.com to make some new stamps which I am really excited about! It's been so much fun to be able to create some new images and they some of my favorites. Now, Spand company.com has teamed up with Markerpop.com for a Blog Hop and Giveaway. Sooo sorry for the short notice because it ends tomorrow night, but you can still hop along and have a chance to win as well as see the new designs:)
Thanks for stopping by, hope you win the giveaways!
xxxTina
Tuesday, December 4, 2012
Hanging Holiday Heart Basket
![]() |
Thanks so much for stopping by- especially those participating in todays Tina Wenke and MarkerPop Blog Hop. This is so much fun!
All of you amazing designers have been making so many beautiful projects
with our stamps and papers. I am truly soooo GRATEFUL!
Since I don’t have a die cut machine yet, I decided to keep my project simple- using hand drawn shapes as templates. I’ve included a digital pdf version of the shapes for you to drag and drop if you would like to try this project yourself J
First, I traced then cut all the shapes used from the papers this required 4 sheets of paper from the Holiday Combination Pack. Here’s a list of the papers I used;
- Gifts (Small Heart)
- Greenery (Small Flower)
- Rejoice (Leaves)
- Holly (Medium Heart)
Then I started on the holiday flower – I stitched all three layers of the flower with the button in the center to hold the flower together. Finally I added pieces of foam tape in between the flower layers to give them dimension and added more foam tape on the bottom of the flower to attach it to the hearts and did the same with the leaves.
I glued the bottom half of the chipboard hearts together with hot glue to make the basket. I curled black wire together with red beads to make the handle. After this, I attached the wire to the heart. I did this by poking 2 small holes into the chipboard with a push pin, pushed the wire through and twisted it back around at both ends.
And the final touch was to tie a green raffia bow onto the left side of the heart right where the wire was connected to the board. Added some candy canes and I was finished:)
Materials Used for the Holiday Hanging Heart Basket;
-1 12x12 piece of Tan Chipboard (used to keep the paper pack flat)
-Red button and thread
-Foam tape
-Hot glue
-Black wire and red beads
-Green paper raffia
Please stop by MarkerPop to see the full collection of my Stampavie Winter Stamps:)
Now, let's talk prizes!
We have donated a prize of 2 stamps (1 of my Stampavie Winter designs and 1 Spring design) plus a pack of my Winter Papers & MarkerPop is giving away a $15 gift certificate. One lucky winner will win it all!
How can you have a chance to win? Simple, just follow these simple steps:
1. Sign up to be a follower while you are here.
2. Head over to the MarkerPop Blog and sign up for an email subscription OR like us on Facebook (will have links).
3. Hop around to our designers & leave a comment on one or more of our Tina Wenke projects. For every comment you leave, you will receive an additional entry into our giveaway!
Sunday, November 4, 2012
Tattered Poinsettia
![]() |
xxxTina
Tuesday, October 30, 2012
Beautiful Card Designs
First, our thoughts and prayers for anyone affected by the storm, we will be watching and thinking of you. Hope you all our safe! We have been fortunate here where we have had only cold winds and some rain.
I wanted to post a couple very sweet designs by my friends Kittie Caracciolo and Michelle Oatman:)
They are wonderful designers and friends and have created 2 beautiful designs using our new Winter Card Making Papers. I can't say enough how much I appreciate these beautiful designs.
Here is Kittie's stylish and festive which she made adding a beautiful paper poinsettia. She has a great description on creating the card as well as a wonderful tutorial on how to make the Poinsettia and Pine on her blog at http://kittiekraft.typepad.com/kittiekraft/.
Next is just such a sweet card design by Michelle Oatman. Hers uses a High Hopes Stamp and is wonderfully colored using Copics Markers with the Winter papers. Michelle has a wonderful blog describing how she made the card and as always extras, such as her antiques and animals that are always fun to see:)
Hope you like these as much as I have!
xxxTina
I wanted to post a couple very sweet designs by my friends Kittie Caracciolo and Michelle Oatman:)
They are wonderful designers and friends and have created 2 beautiful designs using our new Winter Card Making Papers. I can't say enough how much I appreciate these beautiful designs.
Here is Kittie's stylish and festive which she made adding a beautiful paper poinsettia. She has a great description on creating the card as well as a wonderful tutorial on how to make the Poinsettia and Pine on her blog at http://kittiekraft.typepad.com/kittiekraft/.
Next is just such a sweet card design by Michelle Oatman. Hers uses a High Hopes Stamp and is wonderfully colored using Copics Markers with the Winter papers. Michelle has a wonderful blog describing how she made the card and as always extras, such as her antiques and animals that are always fun to see:)
Hope you like these as much as I have!
xxxTina
Tuesday, April 3, 2012
Pysanke Egg Coloring Fun!
Pysanke Easter Eggs
This past week I was blessed with an amazing opportunity to learn the art of creating brilliantly colored Pysanky eggs. A delightful artistic couple in my community hosted a gathering. We learned a brief history of this wonderful Ukrainian tradition that began before the birth of Christ and is now a Lenten ritual in that country. We also learned the technique of creating them.
Many of these beautiful eggs are highly decorated with intricate patterns and symbols intended to bring the person who receives it love, health, fertility, or any blessing the artist wishes. Since we had a limited amount of time I chose organic shapes and abstract patterns because I knew I was going to make a lot of mistakes and they would be easily camouflaged. I was rather pleased with my results.
The technique works like batik where you work in reverse using layers of wax and dies working light to dark. Then finally heating the wax and wiping off the layers to magically reveal the masterpiece. It was soooo much fun!
If you would like to learn more about Pysanky eggs or purchase materials for creating them yourself visit www.ukrainiangiftshop.com. I think I’m going to invest in some supplies of my own and make it a Wenke/Pysanke tradition. LOL
Labels:
crafts,
easter,
egg coloring,
eggs,
pysanke,
spring arts and crafts,
tina wenke,
ukrainian eggs
Subscribe to:
Posts (Atom)